Getting Started
1. Install the app
First install the Snowflake Native App.
2. Grant Permissions
After installing the Balto Orchestrator you must grant it permissions to execute tasks and create warehouses in your account, as well as permissions to manage databases and schema objects for your projects. The database permissions can be granted by any role that can manage grants on the database you want to use. Whenever you use a new database in your projects your must grant the Balto Orchestrator permission to use it.
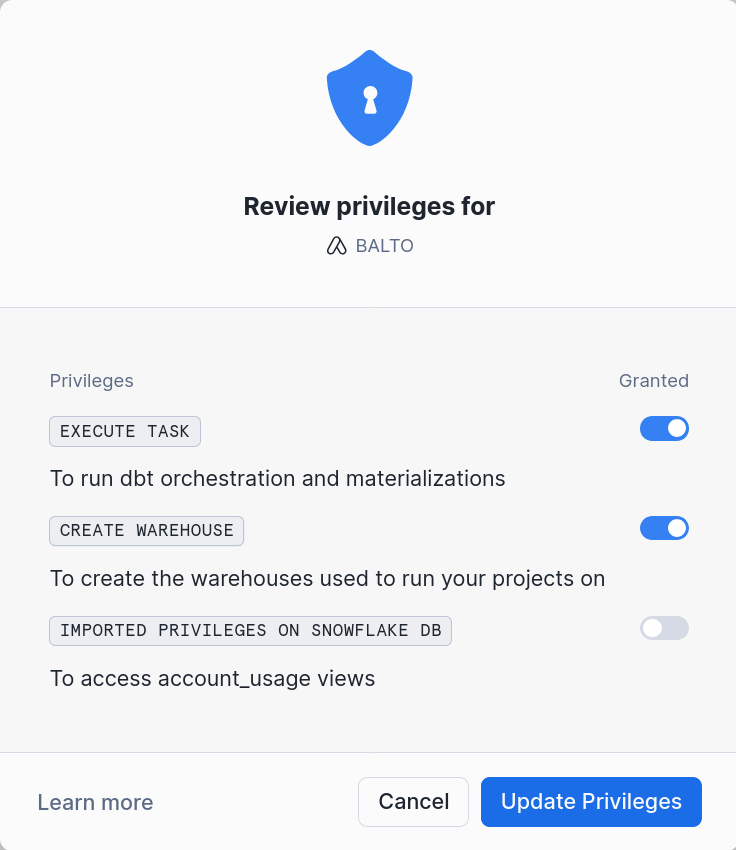
Account Grants
Grant the EXECUTE TASK, CREATE WAREHOUSE, and IMPORTED PRIVILEGES ON SNOWFLAKE DB through the security pane for the Balto App:
Database Permissions
Warning
The remaining steps assume you are deploying a new project, if you want to migrate an existing project to Balto, please follow our migration guide
Execute the following grants for any databases you want to use in your projects.
1 2 3 | |
3. Enable Deploys
Call the following procedure to enable deploys:
1 | |
And you should be able to start deploying your projects using our Github integration or manually using our stored procedure:
1 2 3 4 5 6 | |